 Campus Wi-Fi service
This page is a set-up guide for using the campus Wi-Fi service for students. See the campus Wi-Fi service page for general information on the campus Wi-Fi service.
Depending on the device/model you use or the OS version, the examples of screens in this article may differ, including the specific screens and menu configuration.
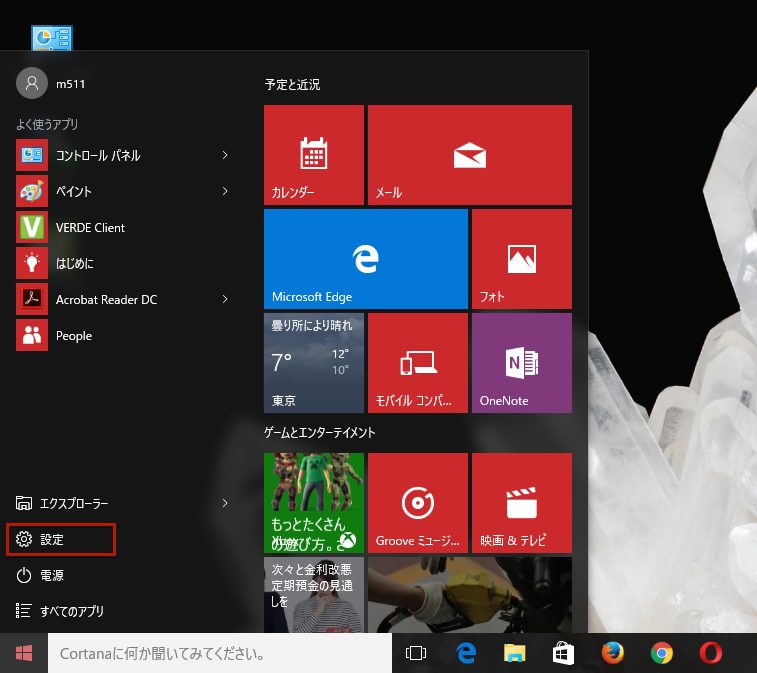
Start up your device, select “Settings” on the start screen.
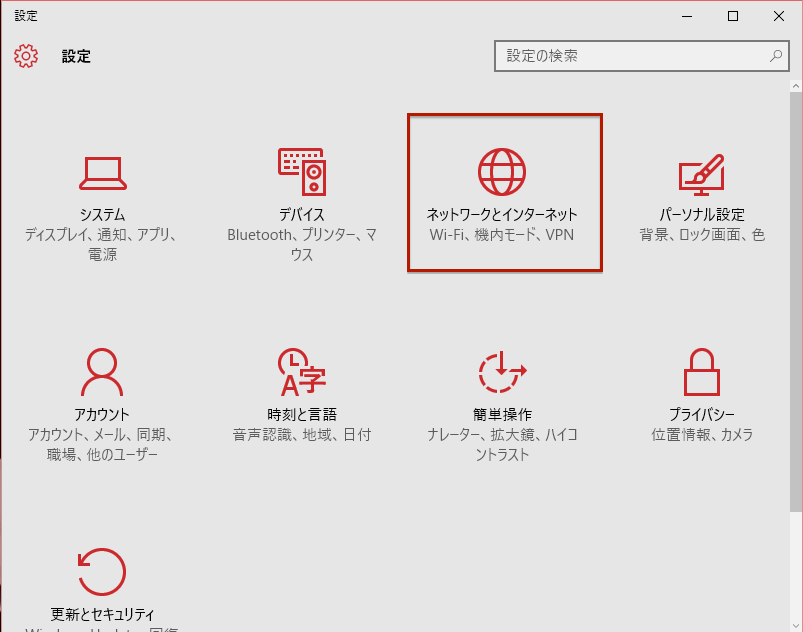
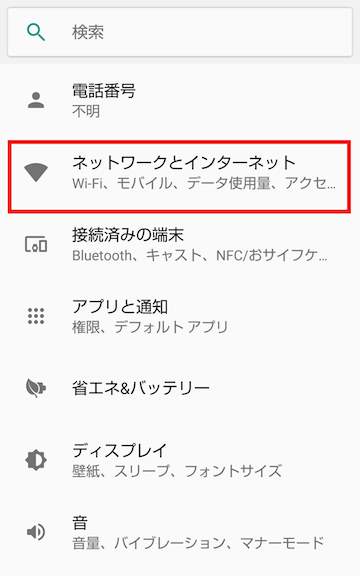
Click on “Network and Internet.”
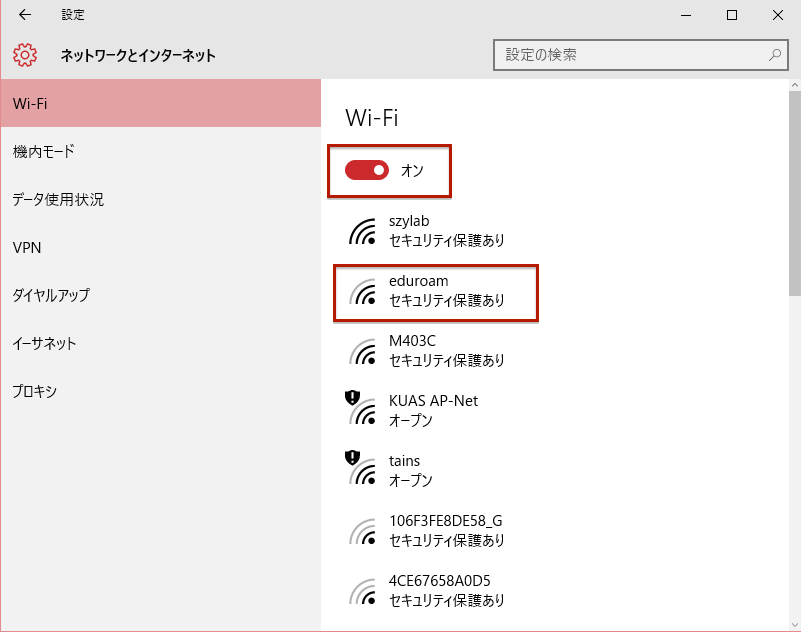
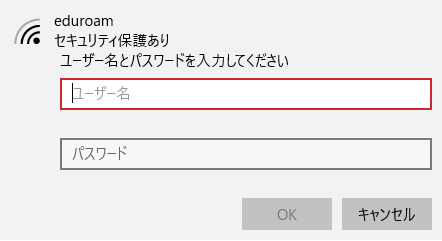
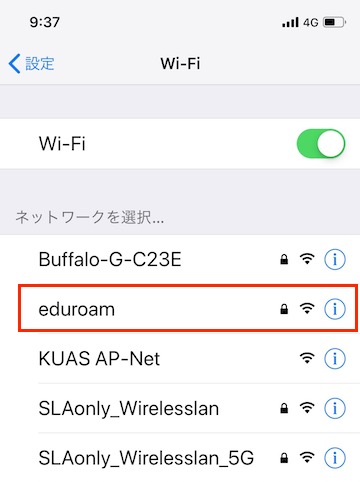
In the Wi-Fi field, confirm that the Wi-Fi is on, and then select eduroam.
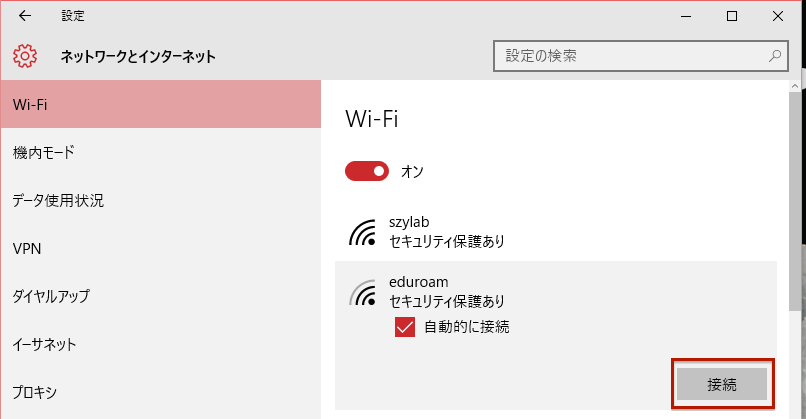
Click on “Connection.” Place a check in “automatically connect,” then the from the next time onward, once the device detects the eduroam antenna, the device will automatically execute authentication of the user name, and automatically connect.
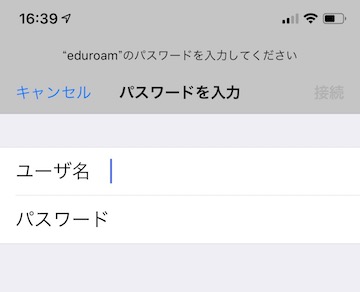
Input your user name and password, then click “OK.” See Section 2.2 “Authentication information” on the campus Wi-Fi service explanation page regarding authentication information.
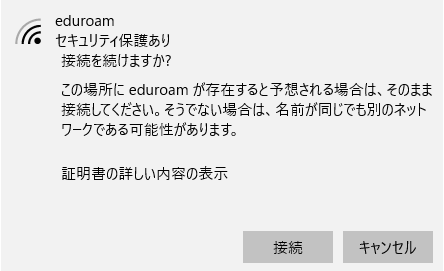
Click on “Connect” in response to the query “Do you want to maintain your connection?”
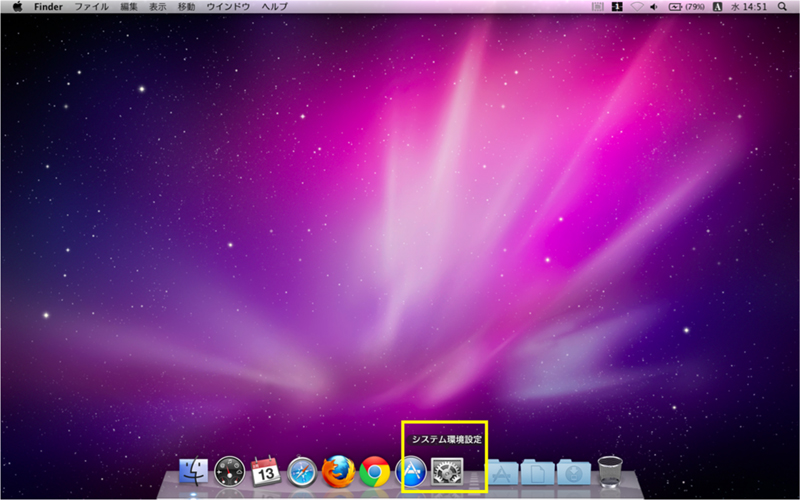
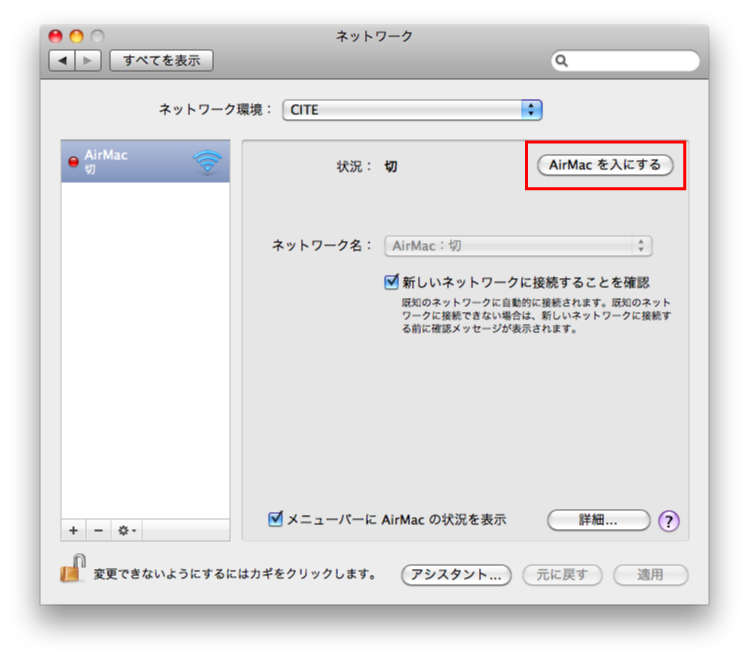
Launch your device, and then boot up “System Environment Settings.”
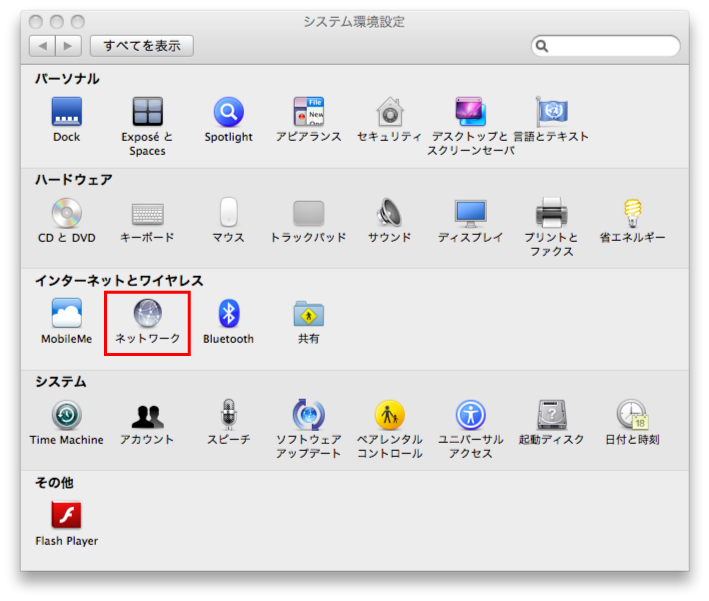
Click on “network.”
Turn the “Wi-Fi” on.
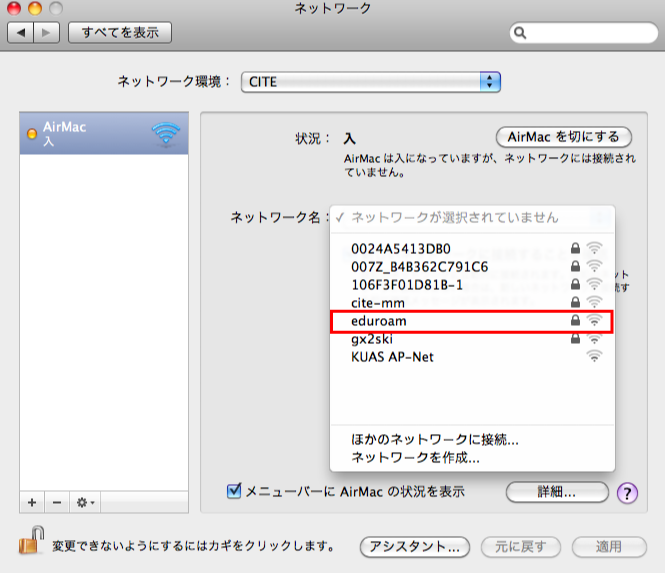
Select eduroam from among the network names.
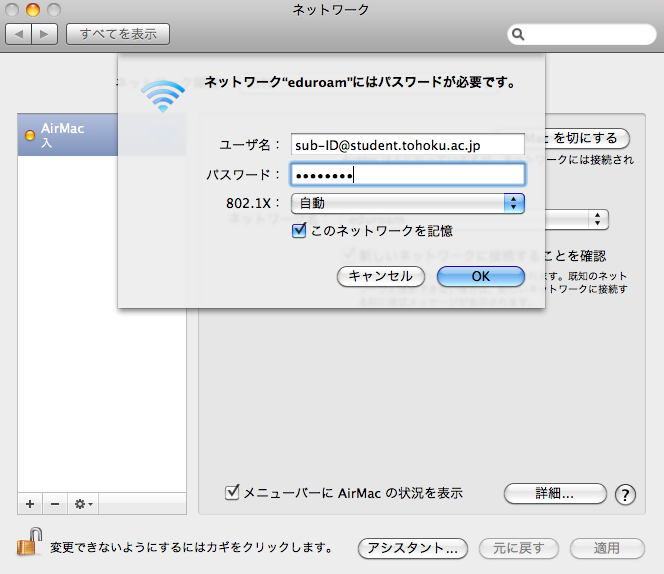
Input your user name and password, and click “OK.” See Section 2.2 “Authentication information” on the campus Wi-Fi service explanation page regarding authentication information.
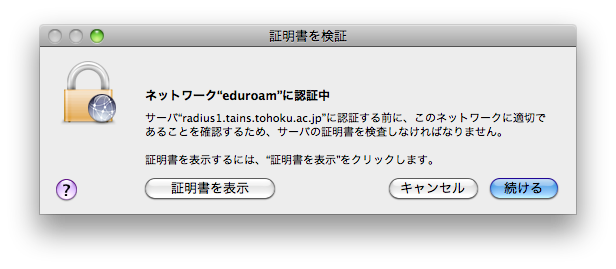
When the “verify certificate” window opens, click on the “continue” button. However, in the event you want to verify the validity of the campus Wi-Fi service server certificate, click on the “Display certificate” button prior to clicking on the “Continue” button. See Section 2.5 “Certificate” on the campus Wi-Fi service page for certificate verification.
Next, input your password into the “Change certificate trust settings” dialogue box. “The server certificate for this service is valid and can be trusted” is a setting for Mac users. Using this setting will allow you to omit the certificate verification process from the next connection onward. Follow the steps below in line with your own policy.
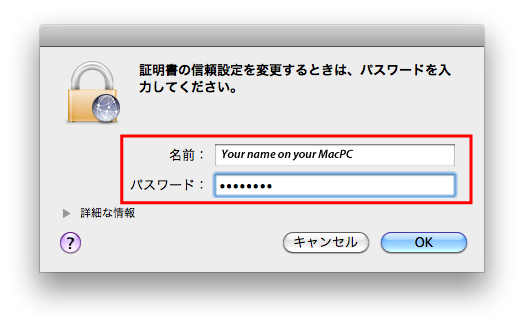
In the event it is okay to use this setting on your Mac, simply enter your password. This authentication is for performing an authentication on a Mac. It is not for authentication for using the campus Wi-Fi service. Enter your name and password respectively in line with the settings on your Mac. In the event you do not want to use this setting on your Mac, click on the “Cancel” button.
Once the message “Authenticated with PEAP” appears, as soon as the connection time counter start moving, the connection is complete.
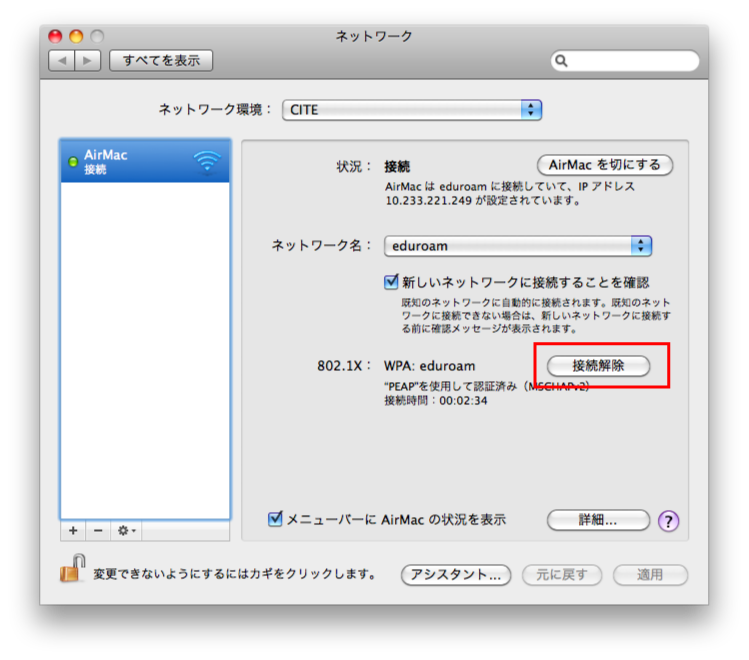
When terminating your connection, implement Step 1 and Step 2 for “connection settings,” mentioned above. Once you get to the screen shown in the figure below, click on the “Disable connection” button.
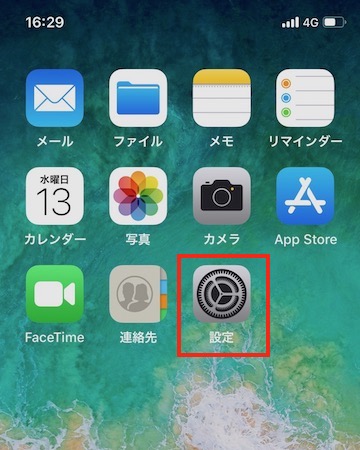
Start up your device, open the home screen and tap on the “Setting” icon.
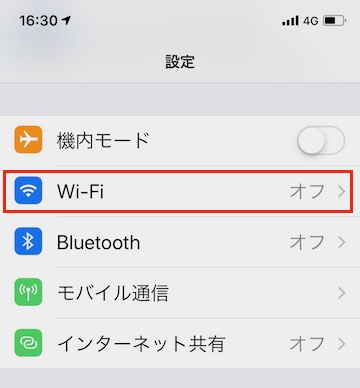
In the settings menu, tap on “Wi-Fi” to turn the Wi-Fi ON.

As shown in the figure below, wait for the device to detect eduroam. Once eduroam is detected, tap on “eduroam.”
Input your user name and password, then click “OK.” See Section 2.2 “Authentication information” on the campus Wi-Fi service explanation page regarding authentication information.
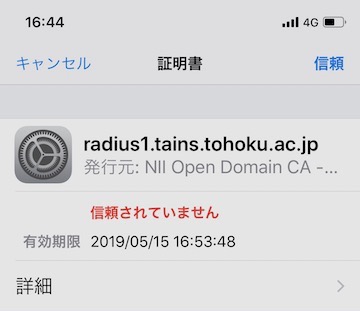
As shown in the figure below, once the certificate window appears, tap on the “Trust” button. However, click on “Details,” in the event you want to verify the validity of the server certificate for the campus Wi-Fi service. See Section 2.5 “Certificate” on the campus Wi-Fi service page for certificate verification.
Switch the Wi-Fi in the figure below to “OFF” to disable your connection.
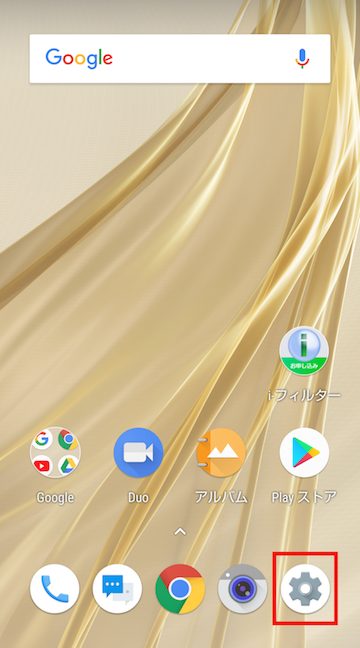
Start up your device, open the home screen, and tap on the menu icon for system settings.
Tap on “Network and Internet.”
Tap on “Wi-Fi.”
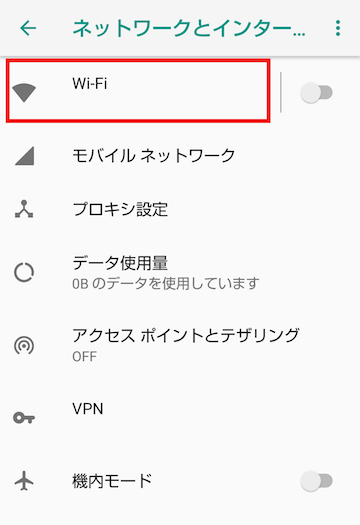
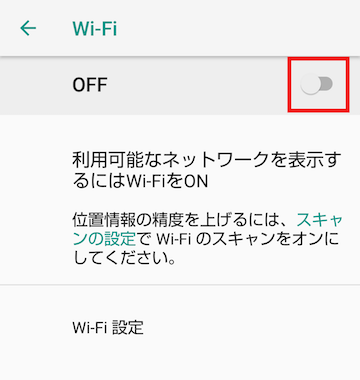
In the event the “Wi-Fi” is turned OFF, tap the switch to ON.
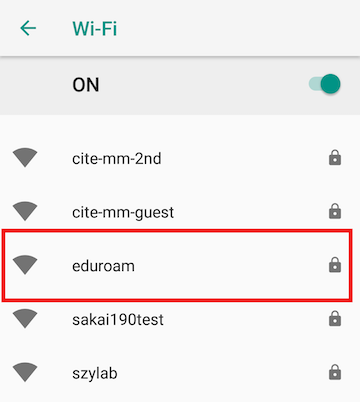
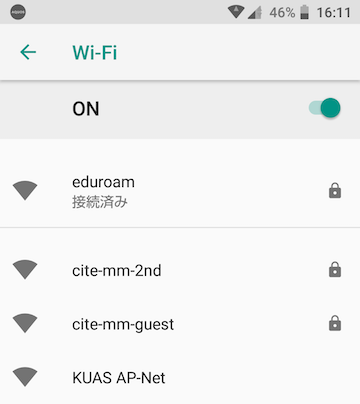
Wait for the device to detect eduroam from the network list. As shown in the screen example below, once eduroam is detected, tap on it.
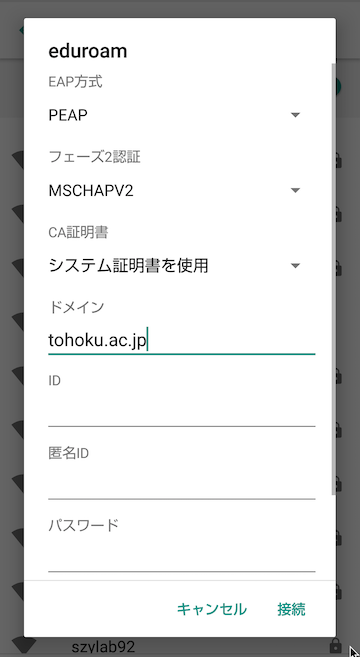
An authentication screen will appear. Input and set up in line with the table below. See Section 2.2 “Confirm authentication information” on the campus Wi-Fi service page regarding the user ID and password. Tap on “Connect” on the bottom right once you have input the necessary information.
Your connection is successful once the “Connection completed” message appears, as shown in the figure below.
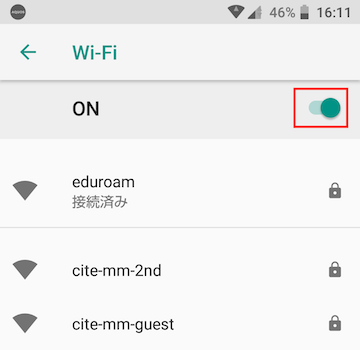
In the screen as shown in the figure below, slide the “Wi-Fi” switch to OFF and disable your connection.
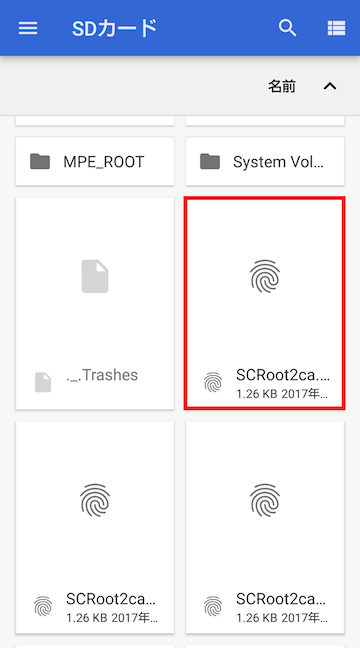
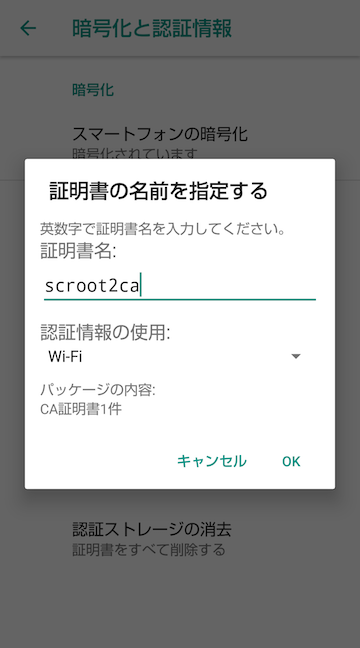
For some Android models, a CA certificate must be manually installed to use the Campus Wi-Fi service. Install the certificate following the procedures below.
Select “microSD card” from the menu that appears → Select and install “SCRoot2ca.crt” Your device may require you to enter your password for this device at this point.
Continuing on, should a window appear asking you to “Specify the name of the certificate,” enter “scroot2ca” into the certificate name, select “Wi-Fi” to “specify connection (authentication information)”, and then tap “OK”
After installing the CA certificate following the aforementioned procedures, when you connect to eduroam, select the following: “PEAP” as the EAP method, MSCHAPV2 as Phase 2 authentication, and “scroot2ca” for the CA certificate.